Introduction:
So, you have decided to start a blog in India.
Well, let me tell you that you made one of the best decisions of your life. Blogging, if done or taken seriously can help you to quit your 9-5 life, travel the world, live a boss free life, work from anywhere and most importantly make money online.
To keep it short and simple: Blogging can completely change your life.
However, some people look to start a blog in India as a scary and frightening task. But, the reality is, starting and running a successful blog is not that difficult, provided that you work hard along with consistency.
So, in this guide, I’ll walk you through a step-by-step process on how to start a blog in India and earn $1000 per month easily.
Overview of blogging in India:
Before going ahead, let me tell you something about the scenario of blogging in India.
Although blogging has been there since the inception of the internet, it became popular in India only after 2010. All thanks to top Indian bloggers like Amit Agrawal, Harsh Agrawal, Arun Prabhudesi and many more.
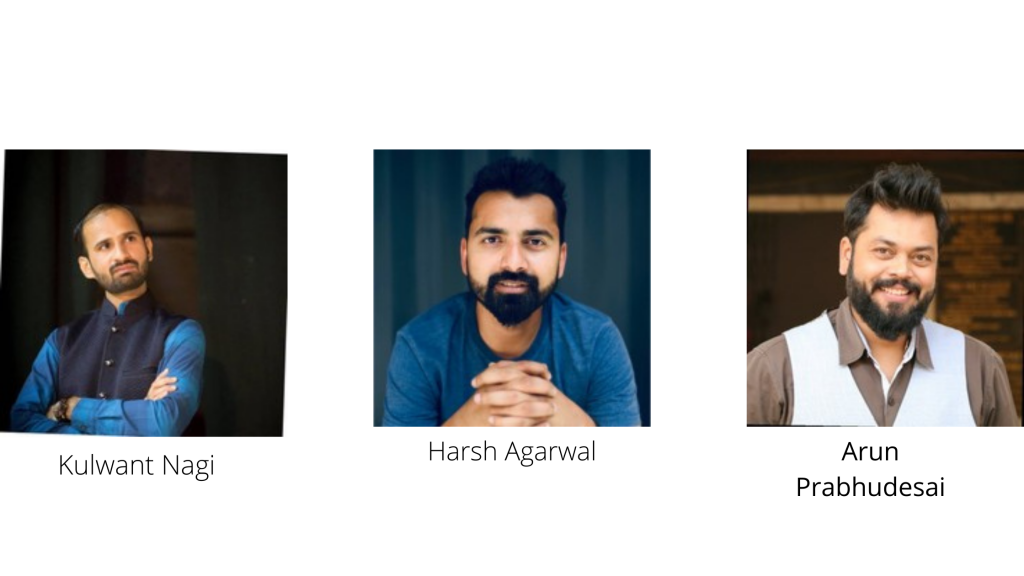
All these Indian bloggers popularized the blogging culture in India and showed people the income-generating power of blogging.
Yes, Indian bloggers like Harsh Agrawal, Kulwant Nagi and many others are minting millions of dollars through blogging.
You’ll be shocked to know that even Indian teenagers are making good money through blogging. Indian blogger, Umar Quershi is a great example of this. He is only 15 years old and doing great in the field of blogging.

So, no matter what your age is, you can surely start a blog in India and make good money out of it.
How to start a blog in India?
1. Start with niche selection
Niche is the foundation of your blog. It is just a topic area on which most of your blog content would revolve. Hence, it is very important for you to select the right blogging niche.
Many newbie and amateur bloggers start writing blog posts on whatever topic that comes in their mind. That is not a great strategy to start with, especially if you want to run a successful blog in India.
For selecting a right blogging niche, you need to pay attention to the following three important points:
- Passion.
Did you know?
Majority of bloggers quit blogging in the first six months. This is just because people don’t write about the topics which are of interest to them. Hence, you must select a topic which you are passionate about.
To find out what you are passionate about, you can make a list of things that you like to do in your day-to-day life. Your list could include your hobby, your work or even anything that you recently bought.
Once you are done with the list, select any one topic that you would like to write about and share it with others.
For example;
Your list includes topics like playing football, listening to music, watching movies, playing video games and so on. Out of these topics, you have dedicated yourself to write about video games.
Now, it’s time to find out what are the topics that you can write about video games. In my personal opinion, you write the following things about video games:
“How to pass a particular stage of XYZ game”
“Review of XYZ video game”
“How to play an XYZ game” and so on.
If you could get 10-20 content for your selected topic then that is your Niche.
- Profit.
I already said that I would teach you how to start a blog in India and make $1000 per day. Hence, while selecting your niche, you must also look at the profitability or monetary value of that niche.
For example;
Writing blog content on topics like how to chat with a girl on Whatsapp, how to date a man or a woman, how to start a Facebook group or page, won’t help you in generating income.
Although, the above-said topics have a good amount of monthly search volume, but the monetary value of such topics is very less.
On the other hand, if you write something about: Best video games of 2020, review of particular video games, cheap video games to buy in 2020 and so on, then you have a chance to make good money through such topics.
- Demand.
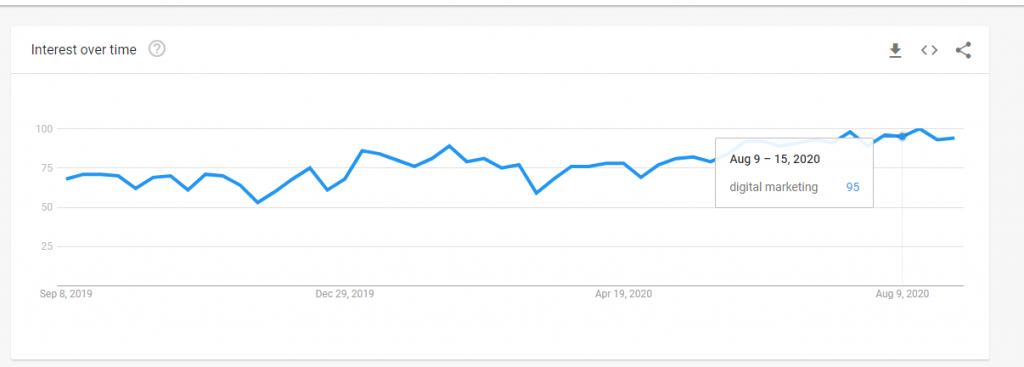
Apart from passion and profit, you must also look for the demand for your niche if you want to start a blog in India. The niche which you have selected for your blog must be trending and evergreen.
Which means people must look for content around your niche even after 10-15 years.
To find the demand for your niche, you can simply enter a few keywords in Google trends and analyze the pattern carefully. If you see a good uptrend in your keyword, then you should go with it.
2. Select a name for your blog
The next step after deciding the niche is to select a name for your blog. The name of your blog would reflect everywhere on the internet. From social media to forums and many other places where you’ll be promoting your blog.
That’s why you need to play your cards wisely while selecting your blog name.
Following are some ideas to select your blog name:
- Your name + niche (digitlniket.com)
- Niche name + keyword (gamersguide.com)
- Brandable name (any unconventional and non-generic word or name)
My personal opinion:
If you want to get quick traffic on your blog then go with niche name + keyword. If you want to create a successful blog for the long term then go for a brandable name and choose any new and unconventional name.
3. Buy a domain and hosting
Now comes the most important part i.e. selecting the domain name and web hosting.
Web-hosting will be the backbone of your blog. It will determine how fast your site gets loaded for users. Hence, it is important to select a fast, reliable, flexible and good web-hosting.
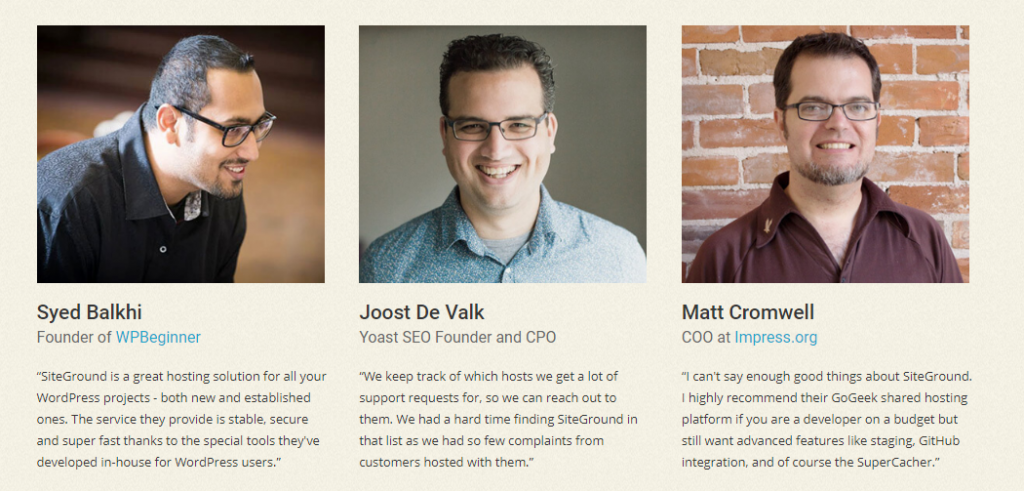
And, when it comes to selecting hosting, I would recommend you to go for Siteground. Siteground is WordPress recommended web-hosting and serves more than 2 million websites on the internet.
The best thing about Siteground is that it offers you world’s best customer support. So, whether you face hosting, WordPress or SEO related problems, Siteground’s team is 24*7 available for you.
Another good thing about Siteground is that it offers one-click WordPress installation and Free SSL and CDN.
So, head over to Siteground.com
Select reliable website hosting if you are a newbie blogger.
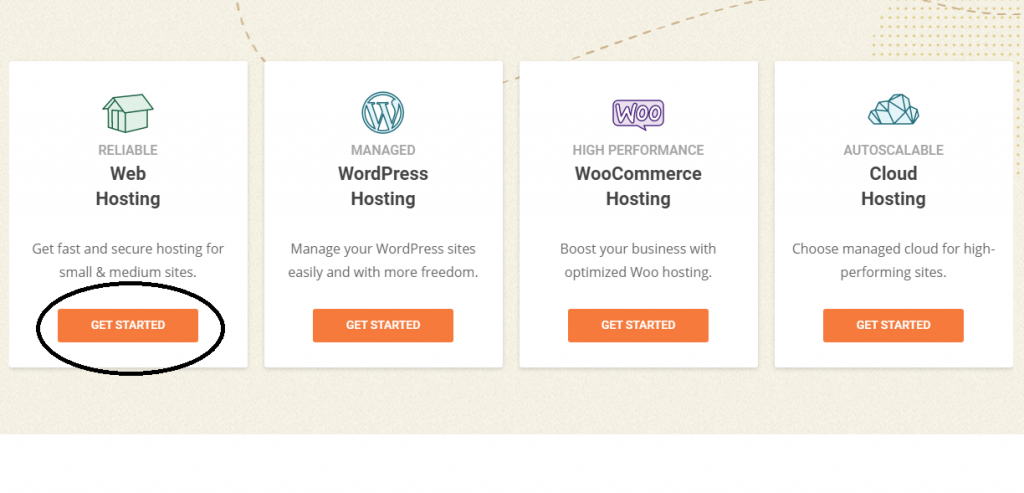
Now, select the hosting plan which you would like. Siteground offers three plans i.e Startup plan, GrowBig and GoGeek plan.
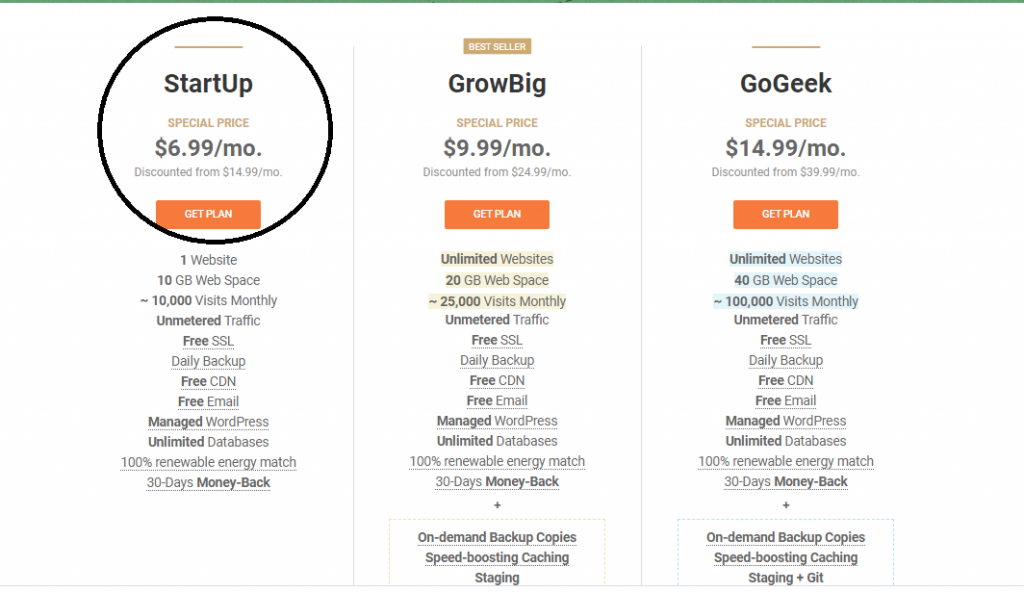
I would suggest you to select a Startup plan as it is best suitable for newbie bloggers and webmasters.
Once you have selected the plan, you’ll be directed to the domain registration page. Now, you need to select the name or domain for your blog which you must decide on earlier.
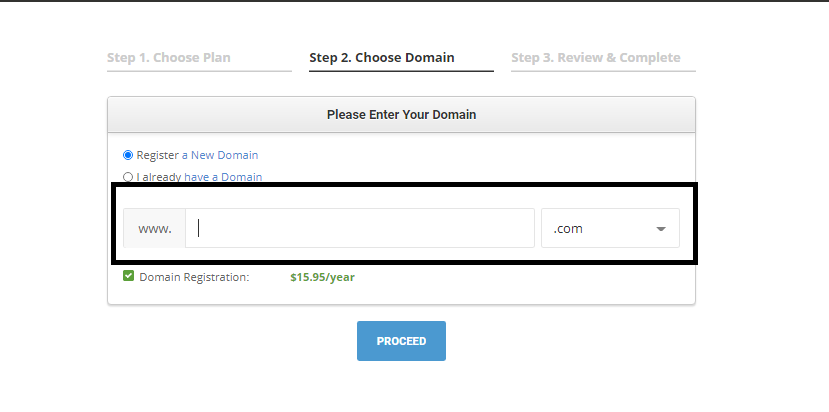
Enter the domain and check for domain availability. If you the domain is available, proceed to the next step.
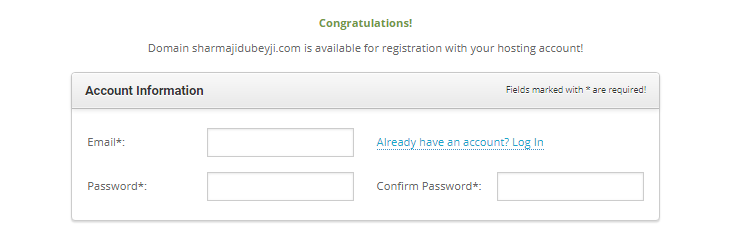
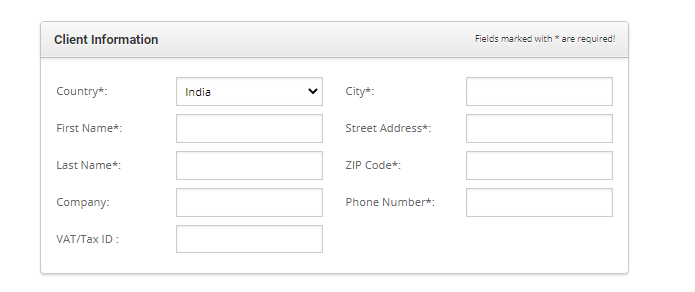
Now, you’ll be taken to review and complete page where you need to fill your account and other details.
Enter your email ID and password. Make sure to remember your password. As it will be needed for logging into the WordPress account.
Next to account information, you’ll need to fill client information. While filling client information, you can keep the VAT/TAX ID blank as it is not mandatory as of now.
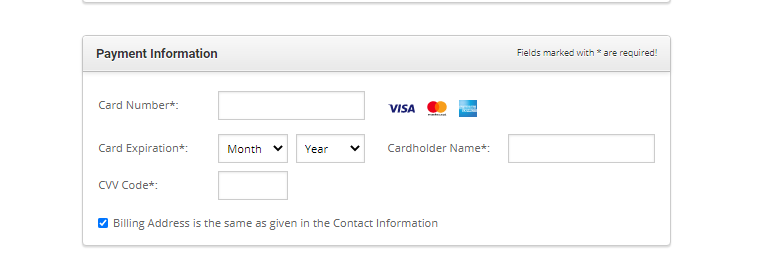
Now, you’ll need to fill the payment information like card number, CVV code, Cardholder name and so on.
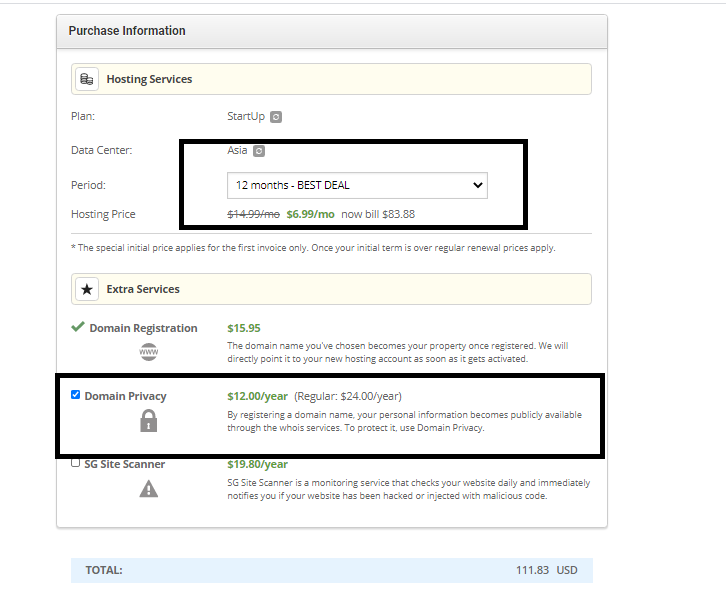
Next will be your purchase information where you need to Review your plan and select the data centre as Asia, Singapore. Keep the period 12 months and tick on domain privacy and untick on the SG site scanner.
(Remember, don’t forget to tick on domain privacy)
Once you have done with it, click on pay now.
Congratulations, you have successfully bought your domain and web hosting.
Now, you’ll receive two emails from the Siteground. First, you’ll get your purchase receipt and later on, you’ll get a thank you email from the Siteground which will look like this:
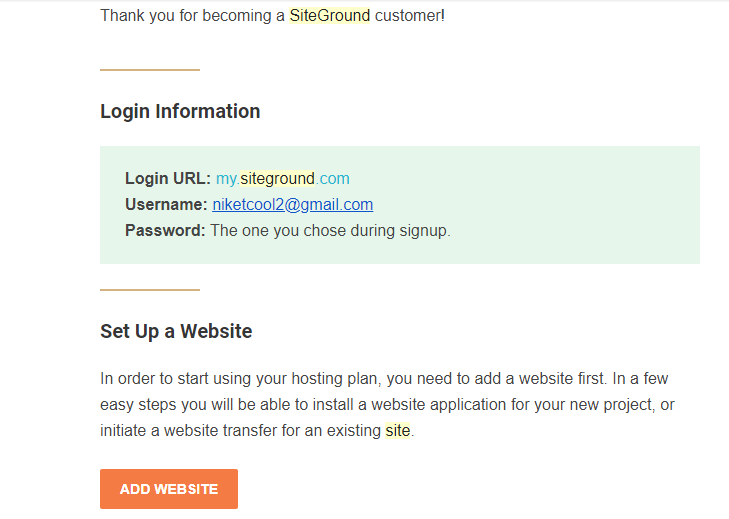
You need to click on the add website and you’ll be directed to the Siteground login-page where you need to enter the password which you have selected at the time of registration.
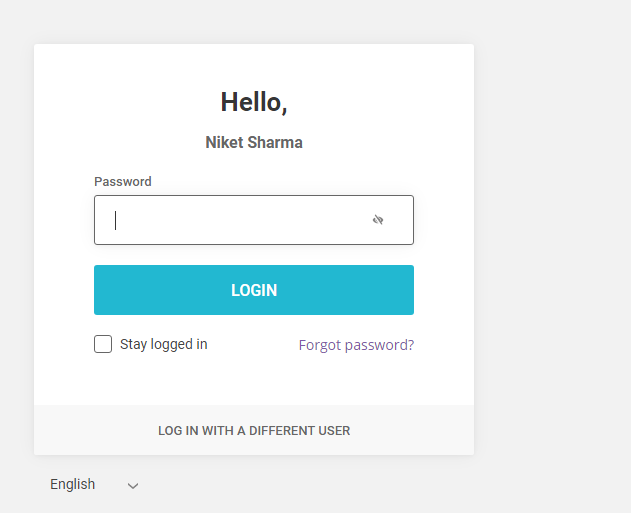
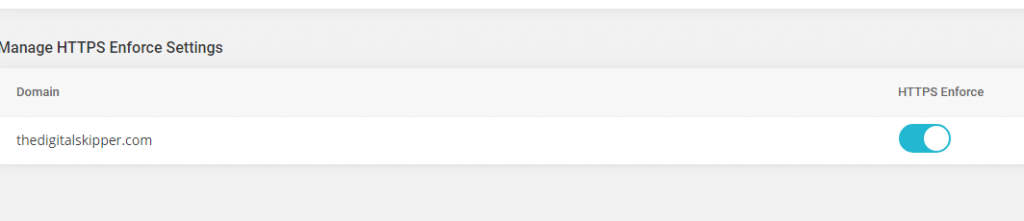
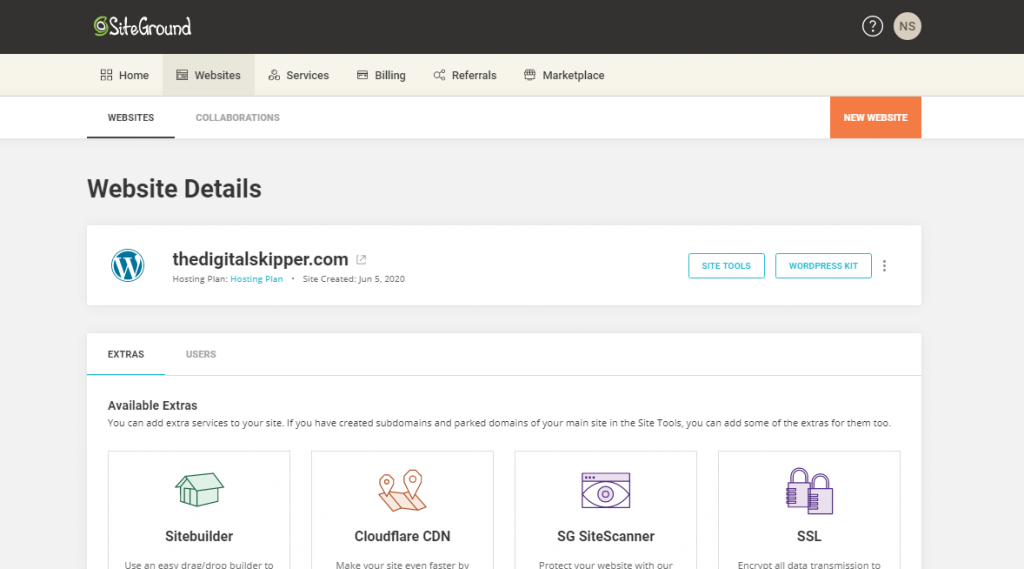
After that, you’ll be taken on to the siteground’s dashboard where you’ll see your site details. Now, you need to click on-site tools and install the SSL certificate by clicking on Security > HTTPS enforce > and enable HTTPS
Once this is done, you need to visit your main dashboard again and click on WordPress kit to login into your WordPress account.
Now enter your email and password that you have entered while purchasing the siteground hosting. Once done, you’ll be taken into the WordPress dashboard from where you can start building your site easily.
The best alternative to Siteground:
Hostings that I don’t recommend:
- Bluehost
- Godaddy
4. Select a theme
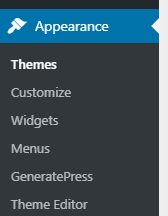
After getting started with WordPress, you need to select a theme for your blog. So, head over to your WordPress and login into your WordPress dashboard. After logging into your account go to the Appearance section and select themes.
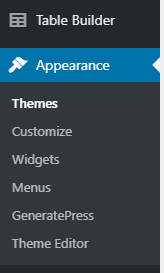
You’ll find tons of free WordPress themes and I would suggest you to install Generatepress as it is fast, lightweight, flexible and easy to use. I am personally using Generatepress Premium and loving it!
5. Make important WordPress settings
After installing the theme, the next important thing is that you need to do the important settings in your WordPress account. Remember, settings are the most vital elements, hence read this step carefully!
On the left side of your WordPress dashboard, you’ll find the settings option just below the tools section. Under Settings, you’ll find general, writing, reading, discussion, media, permalinks and privacy settings.
Let’s start with General settings;
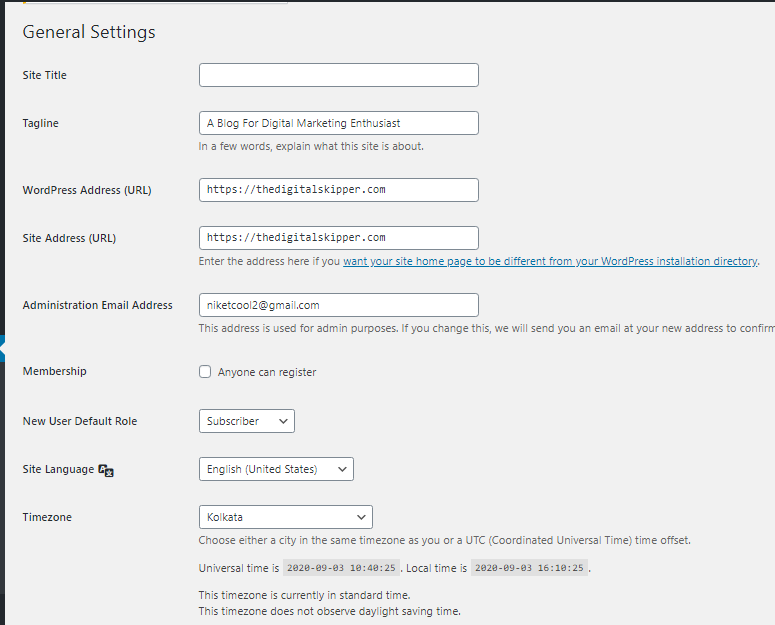
Site Title: Your name of the blog name or keep it blank.
Tagline:
WordPress Address URL; Https://example.com
Site Address URL; Https://example.com
Admin Email ID; Your personal email ID
Membership; Keep it blank
New user default role; Subscriber
Site language; English
Timezone; Kolkata
Date format; Select it according to your wish
Time format; select it according to your wish
Week starts from; Monday
Once all these settings have been done, click on Save settings and move on to the writing settings.
Writing Settings:
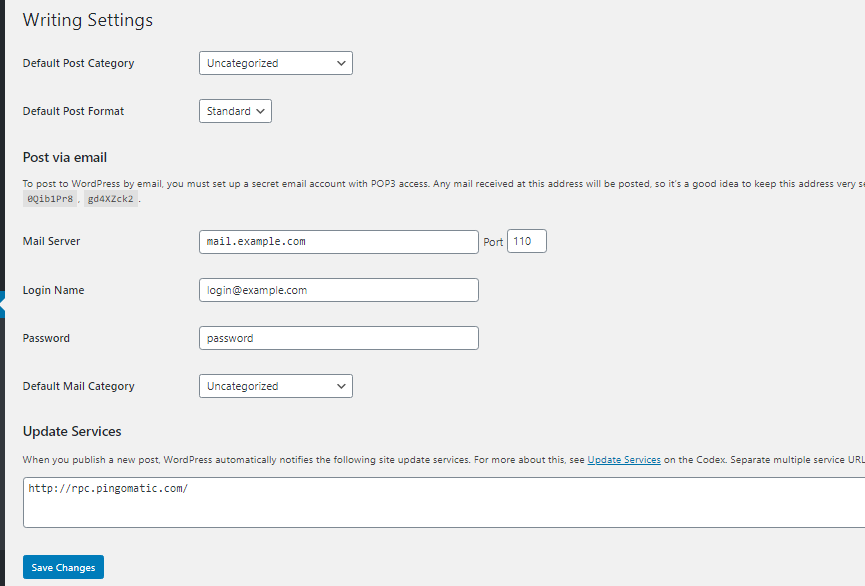
Default post category; Uncategorized
Default post format; Standard
Mail server; Keep the first section blank and keep port to 110
Login name; Keep as it is
Password; Keep blank
Default mail category; Uncategorized
Update services; Keep as it is
Click on save changes and head over to reading settings.
Reading settings:
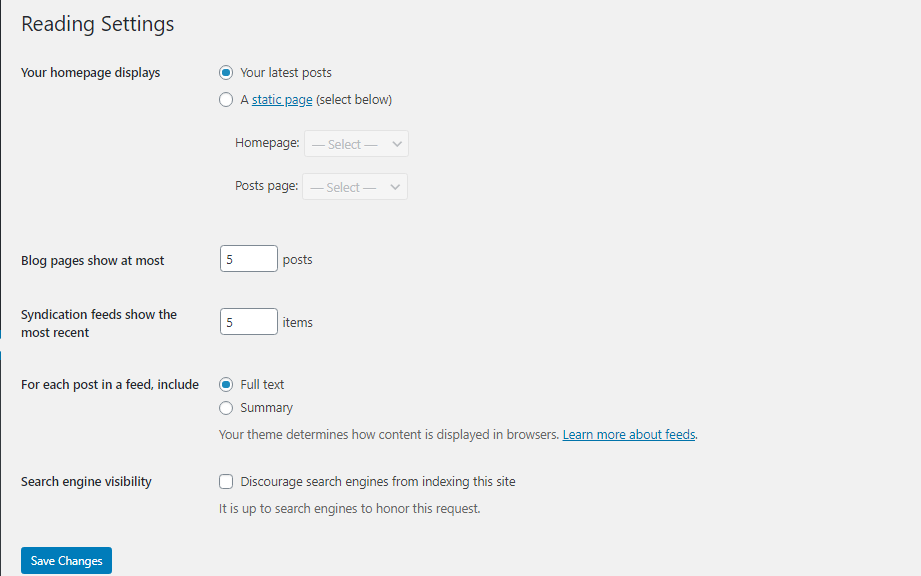
Your homepage displays; Tick on latest posts
Blog posts show at most; Select 5 or the number of posts that you want to show on the home page.
Syndicate feed shows the most recent; Keep it 5
For each post in feed include; Full text
Search engine visibility; Keep it untick without any fail
Click on save settings and head over the discussion
Discussion settings:

Default post settings; All tick
Other comments settings; All tick except users must be registered and log in to comment and automatically close comments on posts older than 14 days.
Email me whenever; All tick
Before a comment appears; Tick on comment must be manually approved
Comment moderation; Enter 1 in the box
Disallowed comment keys; Keep blank as of now
Avatar display; Tick
Maximum ratings; Tick on G suitable for all audience
Default avatar; Tick Gravar logo
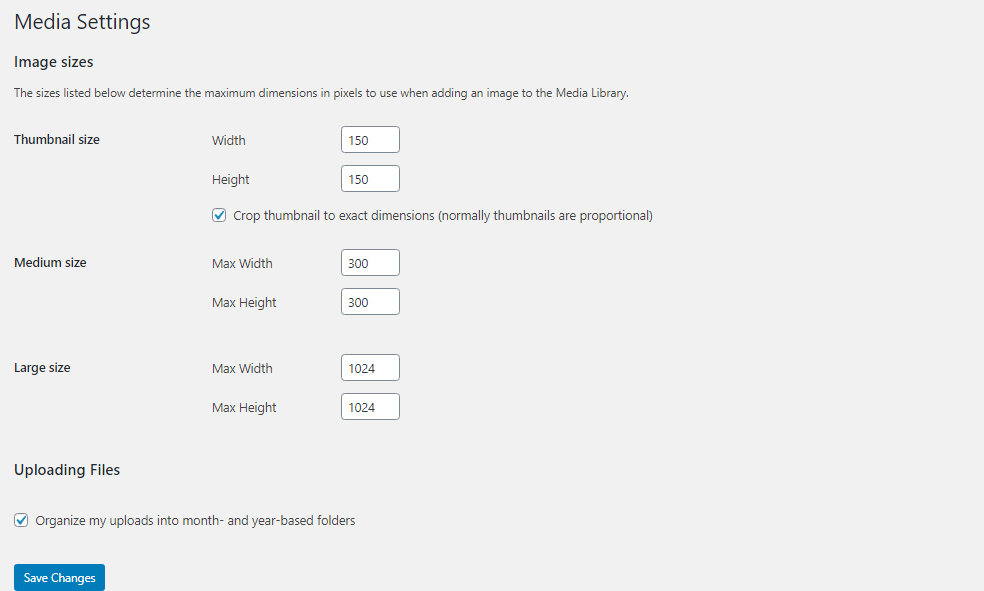
Click on save settings and move over to media settings
For media, settings check the image below and make your changes accordingly.
Now, move on to permalinks settings.
Permalinks settings:
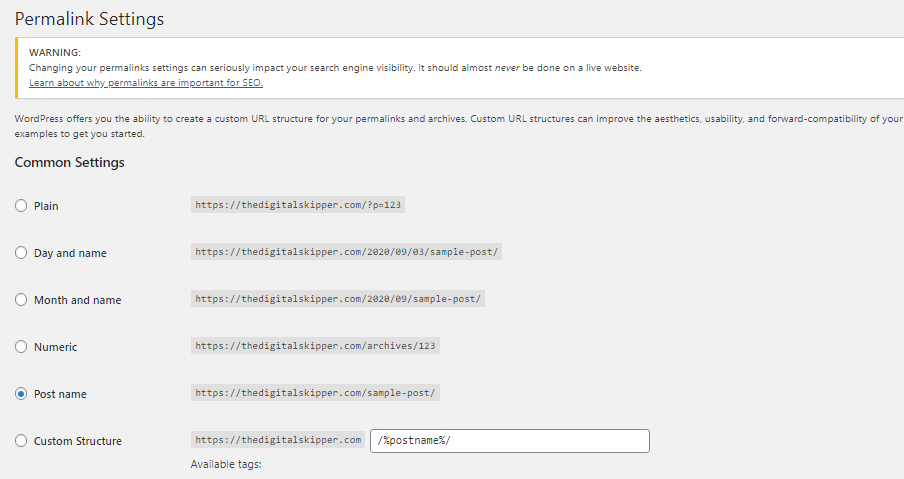
Common settings; Tick post name
Category base; Keep blank
Tag base; Keep blank
Now privacy settings are left, but for now, keep the privacy settings as it is, I’ll tell you more about it in the 8th post.
Now, you can take a deep breath, sit back and relax as most of the important task of creating a blog in India has been done. Now, you’ll be left over with some basic changes and touch-ups.
6. Install Plugins
WordPress plugins are nothing but add-on tools that will help you in enhancing your look and appearance of your blog. I would categorize plugins into two types i.e. Frontend plugins and backend plugins.
Frontend plugins are those plugins that change the look and appearance of your site for you as well as site visitors. Whereas, backend plugins are those plugins that work at the backend of your site. Backend plugins don’t impact the look and appearance of your site.
The important point to note over here is that: More number of front end plugins you install, the heavier your website will be. It will also impact your sites loading speed, which is one of the most important ranking factors.
Hence, make sure that you don’t end up installing unnecessary frontend plugins.
If you have Installed Generatepress Premium theme then you just need to install 3-4 basic plugins and the rest will be taken care by Generatepress.
Following are the four basic WordPress plugin that you need to install initially:
- Yoast SEO: Yoast SEO will help you with creating Sitemap and Robots.txt files for your site. Apart from this, it will also help you in optimizing your blog posts by suggesting necessary and relevant changes.
With the help of this plugin, you can also create Meta descriptions and URLs (Slug or Permalinks) for your blog posts.
- Sassy Social Share: Sassy Social Share will help your site visitors with sharing your content on various social media platforms like Facebook, Twitter, LinkedIn, Youtube and many more.
- ShortPixel: ShortPixel will take care of compressing the images and making it useful as well as search engine friendly. This plugin will also help you in fixing errors like server scaled images.
- SSL insecure content fixer: This plugin will help you with fixing all the errors related to insecure content and mixed content.
- WP external links:
With WP external links, you can manage all your inbound and outbound links. With this plugin, you can make all the external links no-follow or do-follow just with one simple click.
You can also make custom changes if you want.
That’s all for now.
These were the most important and best WordPress plugin that you need to install during the initial days of your blogging career. Later on, as you get familiar with WordPress and blogging, you can install more plugins.
Also;
Don’t forget to take help from Google and YouTube for installing any plugin.
Important point: You need to install any Cache or CDN plugin as Sitegrund will take care of everything for free.
7. Create Important Pages
Now the next important step is that you need to create certain important pages on your site. These pages include about us, contact us, privacy policy, disclosure and disclaimer page.
Remember one thing, WordPress pages and posts are two different things. Pages are created for static content and posts are created for non-static content. So, create WordPress pages from a long-term point of view and create posts for your blog content.
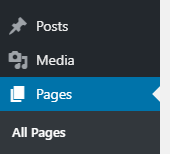
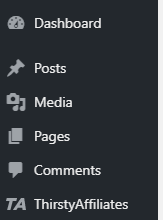
For creating a page open for WordPress dashboard and click on pages at the left side and then add a new page.
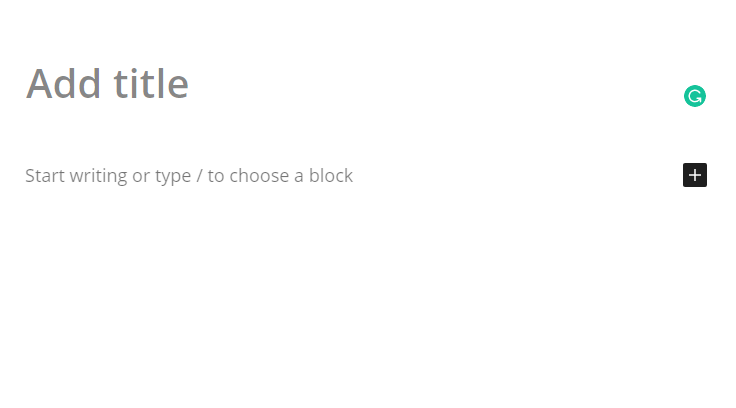
Now enter the title of your page like about us page and start creating content. Once you have created the content click on the Publish button that you’ll see on the right side of the WordPress dashboard.

Now your page will be ready but it won’t show up on your site right now, because you need to create Menus and then add your pages into those menus.
You’ll learn more about how to create Menus and how to add pages in the 9th point.
Now, let me make you understand what important pages you should be creating and what content you should be including in those pages.
- About Us Page:
The about us page should contain the mission and purpose of your blog. You can also write about your story and why you started your blog and what is your motive to start a blog in India.
- Privacy Policy:
The privacy policy page should contain what information you’ll be collecting from the users and what you’ll be doing with that information. In the privacy policy page, you must also mention why you are collecting the data from website visitors.
- Disclaimer:
If you don’t want to get yourself involved in legal matters then play it safe by adding a disclaimer. Example, if you are promoting products on your blog via affiliate links, then you must disclose it to your site visitors.
- Disclosure:
The last important page that you need to create is the discourse page. In this page, you must disclose to your site visitors all your earning sources. Suppose you have monetized your site with Google Adsense then it is a prime responsibility to tell your audience that you’ll be earning money when someone clicks on the ad.
Now, it’s all set and time to add those pages into menus.
8. Create Menus
Till now, you might be ready with all the pages as I said above. Now, you need to add those pages into your site by creating menus. So, head to the Appearance section as seen on the left side of your WordPress dashboard.
From the appearance, you need to select menus.
Now enter the menu name as Menu 1 or anything else that you like and then click on create menu.
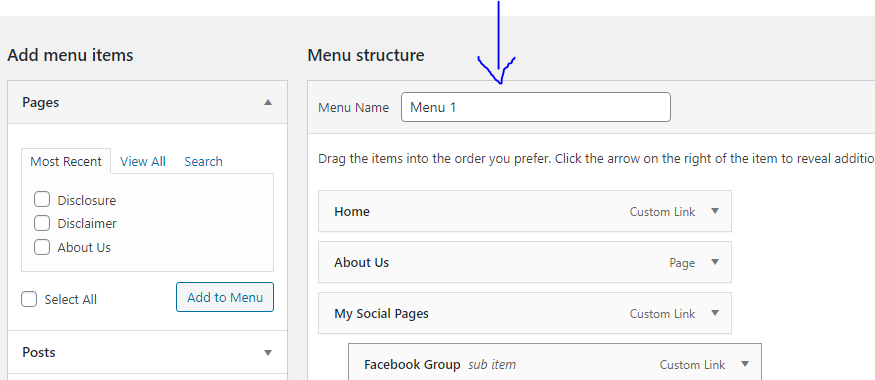
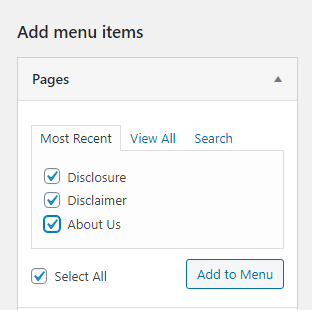
After you have done with the menu name, you’ll see the pages that you have created on the left side.
Now, tick on all the pages and click on add to the menu and click save.
Once you have done this, you’ll see all your menus and pages on the header section of your website. You can even change the sequence of your menu pages by simply doing drag and drop.
9. Start with your first blog post
Now, it’s time to rock n roll and write your first blog ever blog post. Since it is your first blog post, I would suggest you start with introducing yourself. Write about why you have started this blog, your aims and objectives and so on.
For creating a post, click on posts on the left-hand side of your dashboard, then click on add new post.
Now write the title of your blog and start writing content. Once the content is done click on publish content.
Keep your blog posts short, simple and sweet.
Remember, while writing a blog post, you don’t need to be William Shakespeare. Try to keep your blog posts as simple as possible. While writing posts think of a situation where you are writing an essay for an 8th-grade student.
10. Promote your blog
SEO takes time and paid campaigns require money. So, initially, you need to promote your blog posts rigorously on social media platforms, social book marketing sites.
When you are starting a new blog for the first time, you can’t expect visitors to come on your blog, because you have just started out. You’ll surely see some direct traffic on your site but that is useless.
Hence, you don’t have any option but to promote your blog in front of the right target audience.
So, the following are the best ways by which you can promote your blog easily:
- Social media
Social media is great tools for all the new bloggers who have just started their blogging career. Billions of people across the globe are using social media like hell. And, if you started a blog in India, then social media channels like Facebook, Twitter and LinkedIn would be useful to you.
Join a relevant Facebook group and start promoting your blog posts there. You can also share it on Twitter and LinkedIn.
Moreover;
If you are looking for free international traffic then Pinterest can also be vital.
- Social book marketing sites
Social book marketing sites like Mix, Reddit and Tumblr would also help you in driving referral traffic during the initial days of your blogging career in India. I am personally a fan of Mix, which helps me drive a good amount of referral traffic on my site.
- Article submission
The next thing which you can do is submit articles on various article submission sites. By submitting articles, you can drive free traffic as well as get high authority backlinks easily.
Apart from article submission, you can also try your hands on Image submission, blog submission and profile creation.
- Forums
Next to article submission, you can also join various forum submission sites and participate in discussions and post your blog link over there. Make sure that you join a relevant forum and add value to the forum members instead of just spamming the group.
11. Blog monetization tips
If you want to start a money-making blog in India then you also need to learn the nitty-gritty of blog monetization. Initially, when you have just started out with a new blog, your earrings will be very less.
But, as you put in hard work and give time to your blog, your earnings would slowly go up.
So, the following are the best ways by which you monetize your blog;
- Affiliate marketing. (easy)
- Google AdSense. (easy but needs a lot of traffic)
- Sponsored posts or ads. (moderate)
- Banner ads. (moderate)
- Selling ebooks and courses. (difficult)
Blogging mistakes to avoid as an amateur blogger:
Now that you have learnt how to start a blog in India, it is also important for you to know what are the common blogging mistakes that you need to avoid as an amateur blogger.
- Buying cheap hosting
Cheap web-hostings won’t take you anywhere, especially when you want to start a money-making blog in India. You need to understand that cheap hostings would make your website slower and slower. It would negatively impact your server response time as well as uptime.
In the end, you’ll end up paying hundreds of dollars just for migrating into another hosting.
Hence, it is extremely important for you to select your hosting provider wisely.
I personally recommend Siteground to all the newbie bloggers out there. Siteground hosting is quite affordable as well as they have world-class customer support.
I know that their pricing is quite challenging but you also need to look at the quality of their hosting and service.
2. Not building an email list from the start
If you are starting a money-making blog in India then you can t ignore building email lists. Email marketing is one of the best ways by which you can directly connect with your target audience.
Also, its CTR and conversion rate is as high as compared to many other forms of marketing.
3. Not investing in the blog
Another mistake that bloggers do is that they don’t invest in their blog. You need to think of blogging as a business. Every business, in order to be successful, requires investment and hard work.
In the same way, if you want to start a successful blog in India, then you need to do investment in it. You need to buy good hosting, WordPress theme, SEO and CRM tools and much more.
4. Lack of planning and implementation
If you don’t have any plan for the blog then you’ll surely fail with your first blog itself. Planning will help you in taking effective decisions like which strategy to opt for, what to do next and so on.
5. Not being consistent
Another mistake that newbie bloggers make is that they forget to give consistent effort in blogging.
You need to understand that blogging is not a T-20 cricket game, it’s like a test match. So, in order to win the blogging game, you need to put effort each and every day.
FAQs about how to start a blog in India
In order to start a blog in India, you’ll need to spend anywhere between $ 100 to $200 per year.
A career as a blogger in India is quite good and also high-paying. If you take blogging seriously then you can also become your own boss and make millions of dollars through blogging just like other Indian bloggers like Harsh Agrawal, Kulwant Nagi and much more.
Siteground is the best web-hosting for newbie bloggers. They are fast, reliable and have world-class customer support.
You can make money via blogging by doing affiliate marketing, selling your services, courses and ebooks. You can also try your hands on Google AdSense and other ad networks like Media.net.
No, blogging is not at all difficult. It only requires hard work, time and consistent effort. If you can put all these 3 things together then nobody, absolutely nobody can stop you from becoming a successful blogger in India.
In order to become a successful and high earning blogger, you need to invest 5-6 years of your life. However, you can also start getting results via blogging within the first year itself.